
Table of Contents
- How Facility Management Increases Property Value
- Building Curb Appeal Through Exterior Condition
- Creating a Commercial Asphalt Maintenance Plan
- Asphalt Sealcoating Benefits for Long-Term Asset Protection
- Parking Lot Striping Maintenance and Safety Compliance
- Conducting a Commercial Pavement Inspection Checklist
- Measuring ROI: Connecting Facility Improvements to Business Value
- Frequently Asked Questions
Last Updated: October 12, 2026
How Facility Management Increases Property Value
Facility management is the backbone of commercial property success. Maintaining your building systems, parking areas, and grounds helps increase property value and appeal.
A well-maintained facility attracts tenants, reduces vacancy, and commands higher lease rates; poor maintenance drives tenants and buyers away. Your parking lot, building exterior, and grounds form lasting first impressions.
This guide covers how to increase the value and appeal of your business through practical facility improvements, which upgrades matter most, how to prioritize them, and how to measure their impact.
Building Curb Appeal Through Exterior Condition
Your building’s exterior is your property’s handshake with the world. A cracked parking lot, faded striping, or weathered pavement signals neglect; fresh asphalt, crisp striping, and clean grounds signal the opposite.

Exterior condition affects leasing velocity and tenant satisfaction more than most property managers realize. Refreshing your parking area and grounds signals the property is well-managed and worth investing in.
The most impactful exterior upgrades include:
- Fresh asphalt sealcoating to restore color and protect against UV damage
- Crisp white or yellow parking lot striping for clarity and safety
- Pressure washing to remove dirt, algae, and weathering
These improvements are visible, measurable, and immediately noticeable, setting the tone for how your property is perceived and valued.
Creating a Commercial Asphalt Maintenance Plan
A commercial asphalt maintenance plan is your roadmap for protecting your pavement investment. Without one, maintenance becomes reactive and expensive; with one, you’re proactive and cost-effective.
Your asphalt maintenance plan should address:
- Routine cleaning: Remove debris, dirt, and algae monthly or quarterly
- Crack filling: Seal small cracks before they become large failures
- Sealcoating: Apply protective coating every 2-3 years to extend pavement life
Frequency depends on climate, traffic volume, and pavement age. In our region, freeze-thaw cycles and intense UV exposure accelerate wear, making sealcoating and crack sealing especially important.
Utah Sealcoat & Striping builds and executes maintenance plans tailored to your facility, working around your schedule to minimize disruption.
Asphalt Sealcoating Benefits for Long-Term Asset Protection
Sealcoating is one of the highest-return line items in a facility maintenance budget because it slows the largest exterior capital expense most properties carry: pavement replacement. Sealcoating is the cheapest intervention that meaningfully delays that project.
Here is what sealcoating actually does, mechanically:
- Blocks UV oxidation: Sunlight strips the lighter fractions out of the asphalt binder, leaving a brittle, gray, aggregate-rich surface that cracks under load. A sealcoat layer sacrifices itself to UV so the binder underneath does not.
- Repels water intrusion: Water is the primary destroyer of pavement. It enters through hairline cracks, freezes, expands, and propagates the crack from the inside. Sealcoat closes the surface so water sheds rather than soaks.
- Restores uniform color: Fresh sealcoat returns the deep black surface that reads as “new and well-managed” to tenants, prospects, and lenders doing site visits.
The lifecycle math that justifies sealcoating
Think in pavement lifecycle stages rather than annual line items:
- New asphalt (years 0-2): Cure period; no sealcoat yet.
- First sealcoat (years 2-3): Establishes the protective cycle.
- Maintenance cycle (years 3-15+): Sealcoat every 2-3 years, crack fill as needed, restripe every 12-18 months.
- Structural failure (year 15+ without maintenance, later with it): Full-depth repair, mill-and-overlay, or replacement.
Every sealcoat cycle pushes stage 4 further out. That deferral is the return: a property that reseals on schedule buys additional years of service from an asset it already owns.
When sealcoating is the wrong call
Sealcoating is not a universal fix, and applying it to failing pavement wastes money:
- Alligator cracking (fatigue cracking): Interconnected cracks mean the base layer has failed; sealcoat over it will crack within a season. Repair the base first. If you can’t repair the base immediately use crack seal then sealcoat but it is still only a single season remedy.
- Potholes and base failures: These require full-depth patching, not a surface coating.
- Pavement under 6-12 months old: New asphalt must cure before accepting sealcoat.
A reputable contractor will tell you when sealcoating is not appropriate. A bidder proposing sealcoat over alligator cracking without addressing the base is a warning sign.
How sealcoating fits the broader facility value story
Sealcoating is one input into a larger system: pavement condition drives curb appeal, curb appeal drives leasing velocity, and deferred pavement capital drives NOI volatility.
Parking Lot Striping Maintenance and Safety Compliance
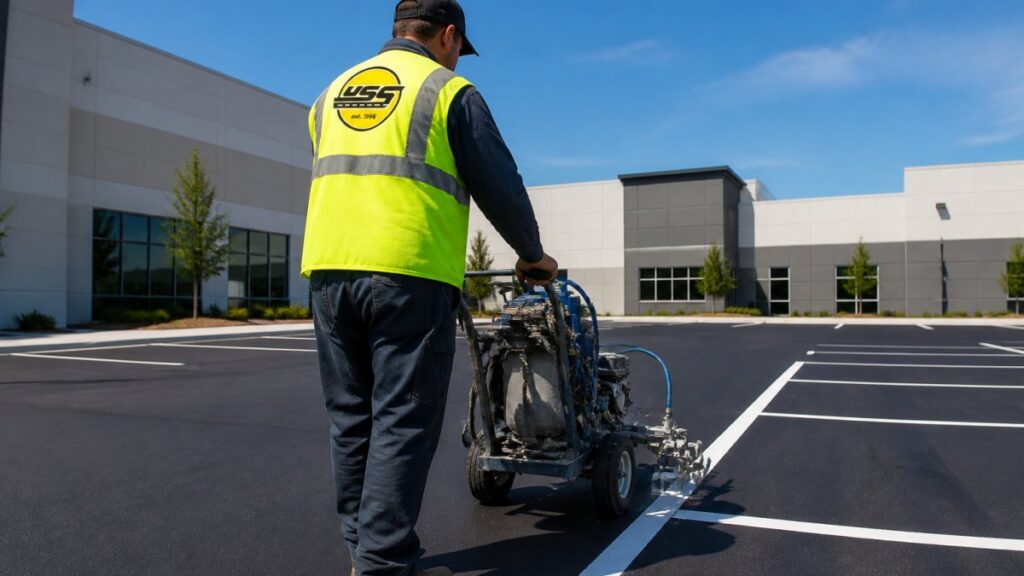
Parking lot striping is more than organization, it’s a safety feature and compliance requirement. Faded or missing striping creates confusion, increases accidents, and exposes you to liability.
Your parking lot striping should be:
- Clearly visible: Drivers should see lines from 20+ feet away, day and night
- Compliant with ADA standards: Accessible parking spaces must meet specific width and marking requirements (Accessible Parking Spaces)
- Properly maintained: Repaint lines as they fade, typically every 12-18 months depending on traffic
Faded striping is a common oversight. Property managers often don’t notice the gradual fade until prospects comment on the poor condition, by then, the damage to perception is done.
Utah Sealcoat & Striping keeps your striping bright, compliant, and professional, handling everything from standard spaces to ADA-accessible spaces, fire lanes, and directional markings.
Conducting a Commercial Pavement Inspection Checklist
A regular pavement inspection catches problems before they become expensive, no pavement expertise required.
Use this commercial pavement inspection checklist:
- Walk the entire parking lot and note any cracks, chips, or surface damage
- Check for potholes or areas where asphalt has broken away
- Look for water pooling or drainage problems
Conduct this inspection at least twice a year, in spring and fall, and photograph problem areas to track condition over time. Small issues caught early are far cheaper to fix than large failures caught late.
Measuring ROI: Connecting Facility Improvements to Business Value
Most facility-management articles say to “track ROI” without explaining how. This section gives you a measurement framework and prioritization method you can run on a spreadsheet, no enterprise CMMS required.
Step 1: Establish a baseline before you spend anything
You cannot prove improvement without a starting point. Capture these numbers for the trailing 12 months before any upgrade:
- Deferred maintenance backlog: Count open work orders older than 30 days and estimate the cost to clear them.
- Energy use per square foot: Pull 12 months of utility bills and divide total kWh and therms by rentable square footage.
- Unplanned downtime: Hours per month that building systems (HVAC, elevators, lighting, security) were offline.
Record these in one row per property. That row is your baseline.
Step 2: Pick the KPIs that match the improvement
Not every upgrade moves every metric. Match the KPI to the intervention:
|
Improvement |
Primary KPI |
Secondary KPI |
|---|---|---|
|
Sealcoat and restripe |
Pavement condition index band |
Curb-appeal survey score |
|
HVAC preventive maintenance |
Unplanned downtime hours |
Energy use per sq ft |
|
LED retrofit |
Energy use per sq ft |
Operating cost per sq ft |
|
Wayfinding and signage refresh |
Visitor satisfaction score |
Tenant complaint volume |
|
ADA compliance remediation |
Open compliance findings |
Liability exposure |
|
Work-order system upgrade |
Response time (median hours) |
Backlog count |
Step 3: Calculate simple payback
For any capital project, the formula is:
Simple payback (years) = Upfront cost ÷ Annual savings or added revenue
Example mechanics (illustrative, not a quote): if an LED retrofit reduces annual electricity spend by a measurable amount and the project cost is known, divide cost by annual savings to get years to payback.
For revenue-side improvements like curb appeal, the calculation is softer: track leasing velocity (days on market per vacant suite) and average lease rate before and after.
Step 4: Prioritize with a simple scoring grid
Rank every candidate project on four factors, scored 1-5:
- Impact on value or revenue, does it move NOI, occupancy, or lease rate?
- Risk reduction, does it reduce liability, compliance exposure, or business interruption?
- Cost and payback speed, lower cost and faster payback score higher.
- Occupant visibility, will tenants, employees, and visitors notice?
Add the scores and fund the highest totals first, the way to sequence a plan when the budget won’t cover everything at once.
Step 5: A 12-month sequenced plan
A practical order of operations for a typical commercial property:
- Months 1-2 (quick wins): Walk the property, document condition, clear safety hazards, refresh striping, clean grounds. Low cost, high visibility.
- Months 3-4 (compliance and risk): Correct ADA parking, fire lane markings, and any code findings. Non-negotiable.
- Months 5-7 (asset protection): Sealcoat sound pavement, crack fill, service HVAC and roof. Defers capital.
Assign an owner to each line, property manager, chief engineer, or vendor, plus a target date. A plan without owners and dates is a wish list.
Step 6: Re-measure at 12 and 24 months
Pull the same baseline metrics 12 months after the first improvement and again at 24 months, and compare side by side. Most property managers see backlog shrink, response times drop, energy per square foot fall, satisfaction scores rise, and vacancy duration shorten, the numbers you take to ownership when requesting the next round of funding.
Frequently Asked Questions
How does asphalt maintenance improve a property’s curb appeal?
Fresh asphalt and clear striping create an immediate positive impression on visitors and customers. Cracked, faded, or poorly maintained pavement signals neglect and reduces perceived property value. Regular sealcoating restores the dark finish and protects against UV damage and weather deterioration. Well-maintained parking lots and driveways demonstrate that a facility is professionally managed, which directly influences tenant satisfaction, employee morale, and customer confidence in your business.
What should facility managers include in a commercial asphalt maintenance plan?
A solid maintenance plan covers preventive measures, inspection schedules, and repair protocols. Include regular sealcoating every 2-3 years, prompt crack sealing to prevent water infiltration, pothole repair, line striping refresh, and drainage management. Schedule inspections at least annually to catch issues early. Document all work with photos and records to track asset condition over time. Prioritize high-traffic areas and address safety hazards immediately. A written plan helps control costs, extends pavement life, and ensures compliance with property standards.
How often should commercial asphalt be sealcoated?
Most commercial asphalt benefits from sealcoating every 2-3 years, depending on traffic volume, weather exposure, and climate conditions. High-traffic parking lots may need more frequent applications. Sealcoating protects the asphalt surface from UV rays, oxidation, water damage, and chemical spills. It extends the life of the pavement, reduces repair costs, and maintains the dark appearance that enhances curb appeal. Your facility manager should assess pavement condition annually to determine the optimal timing for your specific property.
What are the key benefits of asphalt sealcoating for facility managers?
Sealcoating extends pavement lifespan by 5-10 years, reducing long-term capital expenses. It restores the appearance of aged asphalt, improving curb appeal and property value. The protective layer prevents water infiltration, which is the primary cause of potholes and structural damage. Sealcoating also protects against UV damage, chemical spills, and weather deterioration. For facility managers, this means fewer emergency repairs, lower lifecycle costs, better tenant retention, and a property that maintains its value and appeal over time.
What should a commercial pavement inspection checklist include?
A comprehensive checklist should document surface condition (cracks, potholes, alligator cracking), drainage function, line striping clarity and compliance, surface texture and grip, edge conditions, and any hazards. Note the location and severity of damage using photos. Check for standing water, debris, or vegetation growth. Verify that ADA-compliant striping and markings remain visible. Record the date, weather conditions, and any recent repairs. Use this data to prioritize maintenance work, plan budgets, and track how well your facility management strategy is protecting your asset.
