
Table of Contents
- Step 1: Understand ADA Parking Space Requirements
- Step 2: Calculate Accessible Parking Space Dimensions
- Step 3: Verify Access Aisles and Van-Accessible Ratios
- Step 4: Ensure Accessible Route From Parking to Building
- Step 5: Conduct an ADA Parking Lot Inspection Checklist
- Step 6: Address Surface Condition and Slope Compliance
- Step 7: Document, Maintain, and Restripe for ADA Parking Lot Compliance
- Frequently Asked Questions
Last Updated: October 16, 2026
Step 1: Understand ADA Parking Space Requirements
ADA parking lot compliance starts with knowing how many accessible spaces your facility needs, based on total parking spaces. For every 25 spaces, you need at least one accessible space (Accessible Parking Spaces).
The 2010 ADA Standards set these rules for all commercial properties, medical facilities, schools, and public buildings.
Here’s what changes with lot size:
- 1-25 spaces: 1 accessible space required
- 26-50 spaces: 2 accessible spaces required
- 51-75 spaces: 3 accessible spaces required
Beyond 500 spaces, calculate 2% of your total: a 600-space lot needs 12 accessible spaces, and a 1,000-space lot needs 20.
Many facility managers miss this calculation. Check your lot size first. If you’re unsure of your total, count your painted spaces or review your site plan. This single number determines everything else.
Step 2: Calculate Accessible Parking Space Dimensions
Accessible parking spaces must meet specific size requirements. Standard spaces are 96 inches wide (8 feet), giving drivers room to open doors and load mobility devices.
Van-accessible spaces measure 132 inches (11 feet), giving wheelchair lifts and ramps room to deploy safely.
Here’s the breakdown:
| Space Type | Width | Length | Access Aisle Width |
|---|---|---|---|
| Standard Accessible | 96 inches (8 feet) | 240 inches (20 feet) | 60 inches (5 feet) |
| Van-Accessible | 132 inches (11 feet) | 240 inches (20 feet) | 96 inches (8 feet) |
Length stays the same for both: 240 inches minimum. The access aisle runs alongside the space. It’s the unmarked area where people transfer in and out.
Measure twice, paint once.
Restriping an entire lot costs time and money. Get the dimensions right from the start. Use a tape measure and mark your spaces with chalk before painting. This prevents costly mistakes.
Step 3: Verify Access Aisles and Van-Accessible Ratios
Access aisles are the unmarked zones next to accessible spaces where people transfer from cars to wheelchairs.
Standard accessible spaces need a 60-inch access aisle; van-accessible spaces need 96 inches. Both must run the full 240-inch length of the space.
Van-accessible spaces follow a ratio rule. For every 6 accessible spaces, at least 1 must be van-accessible. Here’s how to calculate:
- 1-6 accessible spaces: 1 van-accessible required
- 7-12 accessible spaces: 2 van-accessible required
- 13-18 accessible spaces: 3 van-accessible required
Two access aisles can share one space if positioned correctly, saving lot space, but most facilities use one aisle per space to avoid confusion.
Van-accessible spaces are expensive to maintain but essential. Don’t cut corners here. Users with mobility vans depend on these spaces. Proper ratios show your facility takes accessibility seriously.
Step 4: Ensure Accessible Route From Parking to Building
An accessible route connects your parking spaces to the building entrance. This path must be clear, firm, and level. Obstacles block access and create liability.
Your accessible route must:
- Start at the parking space or access aisle
- Lead to the nearest accessible building entrance
- Maintain a firm, stable, slip-resistant surface
The maximum slope for an accessible route is 1:20 (5%), for every 20 inches of horizontal distance, the route can rise or fall only 1 inch.
Check your route seasonally: a route that works in summer can fail in winter if snow and ice aren’t cleared. Document your maintenance schedule.
Step 5: Conduct an ADA Parking Lot Inspection Checklist
This step turns Steps 1 through 4 into a repeatable field audit you can run quarterly, or after any repaving, restriping, or snow event.
Tools to bring
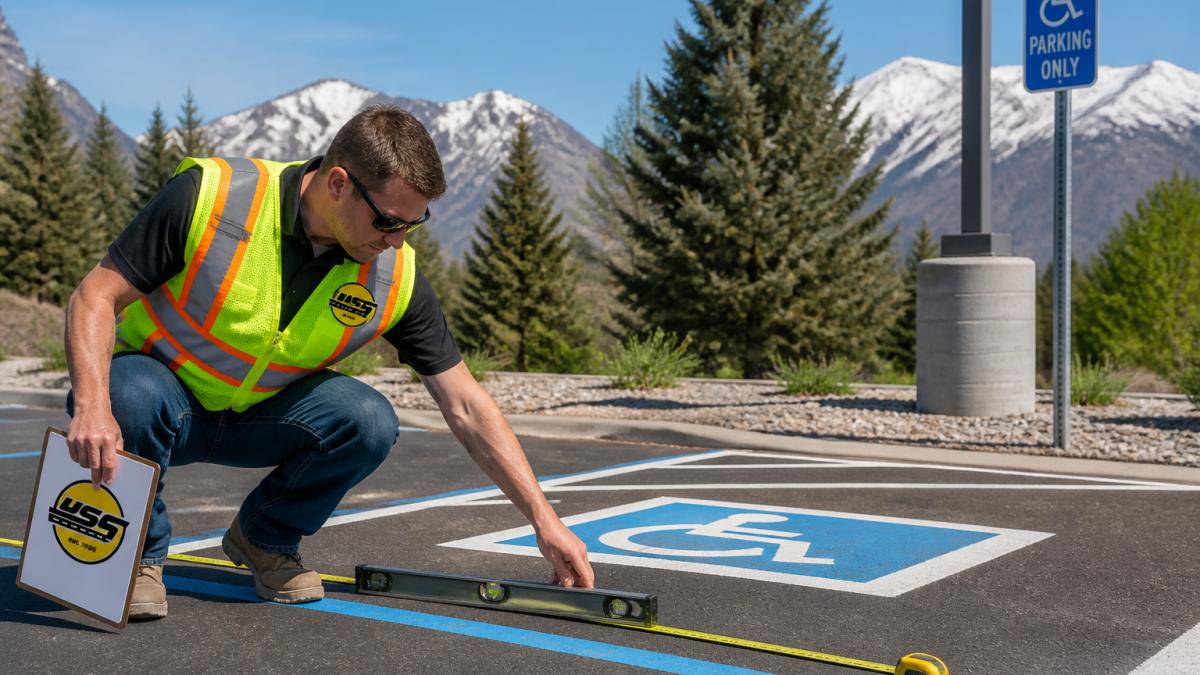
- 25-foot or 100-foot tape measure (retractable, with a locking tab)
- Digital level or a 24-inch magnetic torpedo level with a slope gauge
- Chalk, marking crayon, or paint pen for temporary reference marks
Where to measure
Measure each accessible space at three points, front, middle, and rear, and record the narrowest reading, since paint lines drift. For access aisles, measure clear width between the stripe lines, not center to center. For slopes, take readings at the space, the aisle, and the route midpoint.
Slope tolerances to check
- Cross-slope in an accessible space or access aisle: no steeper than 1:48 (about 2.08%) (Accessible Parking Spaces)
- Running slope of an accessible route: no steeper than 1:20 (5%), steeper than that and it is a ramp, which triggers handrail and landing requirements
- Level landings at grade changes: 1:48 or flatter in all directions
A digital level that reads in percent is easier to use in the field than one that reads in degrees. If your reading is 2.1% or higher on a cross-slope, flag it, you are at or past the limit.
The field checklist
- Count total parking spaces and confirm the accessible-space count against the Step 1 table
- Confirm the van-accessible count against the Step 3 ratio
- Verify signage is mounted at the correct height, faces the right direction, and is not obscured by foliage or equipment
Documentation that holds up
Keep both photos and measurements. For each deficiency, capture a wide shot showing context and a close shot showing the tape or level reading, and name files with the date and space number (for example, 2026-10-16_space-A3_width.jpg) so records stay searchable.
Run the audit in the same order every time, count, measure, slope, route, signage, photos. A consistent sequence makes it easy to spot what changed since the last inspection and to hand the log to a contractor or an accessibility consultant without re-explaining the site.
A 100-space lot takes two to three hours for a thorough first pass and about half that on later visits once the baseline is recorded. Budget the time; rushed audits miss the small slope and width deviations that generate the most complaints.
Step 6: Address Surface Condition and Slope Compliance
Surface and slope problems generate complaints fastest because they affect every user every visit. This step covers what to look for, how to measure it, and how to sequence repairs.
What “firm, stable, and slip-resistant” actually means in the field
The 2010 ADA Standards use those three words without a numeric test. In practice, inspectors look for:
- Cracks wider than 1/4 inch, which can catch a caster or a cane tip
- Vertical lips or heaves over 1/4 inch at joints, utility covers, and curb transitions
- Soft spots where a probe or a heel sinks, a sign the base is failing under the surface
- Standing water after rain, which signals a low spot and a cross-slope problem
A 1/4-inch lip, roughly two stacked quarters, is the threshold most practitioners use when deciding whether a transition needs a bevel or a patch.
How to measure slope correctly
Slope is measured in two directions, and both matter:
- Cross-slope (side to side, across the width of the space or aisle): must not exceed 1:48, which is about 2.08%. This is the one that fails most often, because pavement settles unevenly and restriping does not fix it.
- Running slope (front to back, along the direction of travel): must not exceed 1:20 (5%) on an accessible route. Anything steeper is a ramp and triggers handrail, landing, and edge-protection requirements.
Take readings at the front, middle, and rear of each space and at the midpoint of each access aisle. Record the highest reading, not the average, the standard is a maximum, not a mean.
A space can pass a width check and still fail on cross-slope. Do not assume that fresh paint means a compliant space. Measure the pavement, not the stripes.
Prioritizing repairs by risk, cost, and disruption
Not every defect needs the same urgency. A phased approach keeps the lot usable while you work through the list:
- Immediate (safety and access blockers). Lips over 1/4 inch on the accessible route, missing or damaged curb ramps, standing water in an access aisle, or a slope reading over the limit. These block access today and should be corrected before the next business day if possible.
- Near-term (compliance risk). Faded markings, missing or obscured signage, cracks between 1/4 inch and 1/2 inch, and access aisles that have been repurposed for cart storage or snow piles. Schedule within the current quarter.
- Planned (lifecycle). Sealcoating, full restriping, and base repairs. Bundle these so you are not mobilizing a crew twice. A common pattern is to correct slope and surface defects first, then sealcoat and restripe in the same mobilization.
Sequencing around site operations
Restriping and sealcoating shut down sections of a lot. Most property managers phase work by row or zone, keeping accessible spaces near the main entrance available as long as possible and relocating them temporarily with signage if a zone must close. Coordinate with tenants and delivery schedules before the crew arrives.
When to bring in a specialist
If your slope readings are consistently over the limit, if the base is failing under the surface, or if the accessible route crosses a grade change you cannot resolve with a bevel, bring in a qualified accessibility consultant or a civil engineer before you spend money on cosmetic fixes. Sealcoating over a slope problem hides it for a season and makes it worse the next.
Surface and slope work is where compliance and capital planning meet. Fix the access blockers first, bundle the cosmetic work second, and get a professional opinion before you pave over a problem you cannot see.
Step 7: Document, Maintain, and Restripe for ADA Parking Lot Compliance
Documentation is your defense: records of inspections, repairs, and maintenance show good-faith effort to comply if a violation claim arises.
Create a maintenance log:
- Inspection date and findings
- Repairs completed and dates
- Restriping dates and scope
- Seasonal maintenance (snow removal, etc.)
Restripe every 2-3 years depending on traffic and weather. Fresh markings guide users and demonstrate compliance.
Maintenance keeps your lot safe and accessible: fill cracks before they widen, repair crumbling edges, remove debris, and address slope issues promptly.
At Utah Sealcoat & Striping, we handle the full scope: sealcoating, striping, and repairs. Your parking lot gets refreshed and renewed, and your compliance stays solid.
Frequently Asked Questions
How many accessible parking spaces does a parking lot need?
The number of ADA parking spaces required depends on your total parking spaces. For lots with 1-25 spaces, you need 1 accessible space. For 26-50 spaces, you need 2. For 51-75 spaces, you need 3. For 76-100 spaces, you need 4. The ratio increases as your lot grows. At least one space must be van-accessible for every six accessible spaces (or fraction thereof). Consult the 2010 ADA Standards for exact calculations based on your facility’s total parking capacity.
What are the key ADA parking space requirements for dimensions and access aisles?
Standard accessible parking spaces must be at least 96 inches wide (8 feet). Van-accessible spaces must be at least 132 inches wide (11 feet). Access aisles must be at least 60 inches wide (5 feet) for standard spaces and 96 inches wide (8 feet) for van-accessible spaces. The access aisle connects the space to the shortest accessible route leading to the facility entrance. All surfaces must be firm, stable, and slip-resistant, with a maximum slope of 1:48 in any direction.
What does an accessible route from parking to building entrance require?
An accessible route from the parking space to the nearest facility entrance must be continuous and unobstructed. The route must have a minimum clear width of 36 inches. Slopes cannot exceed 1:20 (5%). The surface must be firm, stable, and slip-resistant. Any curbs must have a curb ramp with a maximum slope of 1:12. Handrails, level landings, and protection from weather may be required depending on the route length and design. The route should be the shortest practical path to the entrance.
How often should I conduct an ADA parking lot inspection checklist to stay compliant?
Conduct a full ADA parking lot inspection checklist at least annually, or more frequently if weather, heavy use, or maintenance work affects your lot. After winter weather, inspect for snow and ice removal compliance, surface damage, and slope changes. After any restriping or repair work, verify that markings, signage, and surfaces meet ADA standards. Document each inspection with photos and notes. Regular inspections catch problems early, reduce liability risk, and ensure your facility entrance and parking areas remain accessible year-round.
ADA parking lot compliance protects your facility and your users. Start with requirements, calculate spaces correctly, verify dimensions, and inspect regularly. When you’re ready to restripe or repair, Utah Sealcoat & Striping brings expertise and reliability. We’ve maintained parking lots across the region for three decades. Get a free quote today and let us show you why property managers trust us to keep their lots safe, compliant, and looking sharp.
