
Table of Contents
- Why Proper Preparation Matters Before Sealcoating
- Assess Your Asphalt Condition and Readiness
- Remove Loose Debris, Leaves, and Surface Dirt
- Clean the Surface with Pressure Washing
- Treat Oil Stains and Grease Before Sealcoating
- Repair Cracks and Potholes Before Sealcoating
- How Long Asphalt Should Dry Before Sealcoating
- Your Asphalt Sealcoating Preparation Checklist
- Frequently Asked Questions
Last Updated: October 17, 2026
Why Proper Preparation Matters Before Sealcoating
Learning how to prepare asphalt for sealcoating is the difference between a job that lasts and one that fails within months. We’ve seen it happen too many times: a contractor rushes through prep work, applies sealer, and the coating peels off within weeks.
Here’s the reality: sealcoating is only as good as the surface underneath it. If you skip proper preparation or cut corners, the sealer won’t bond correctly. It will fail, no matter how quality the product is.
At Utah Sealcoat & Striping, we know that preparation determines everything. A properly prepped surface means your sealcoat will adhere correctly, last longer, and protect your asphalt investment.
Assess Your Asphalt Condition and Readiness
Before you start any prep work, take time to evaluate your asphalt. Not all driveways are ready for sealcoating right now. Some need repairs first.
Walk the entire surface and look for these issues:
- Cracks wider than 1/4 inch, these need filling before sealing
- Potholes or chunks missing, patch these first
- Extensive alligatoring (a pattern of small cracks), this may indicate the asphalt is too damaged for sealing alone
- Soft or spongy spots, these suggest underlying problems that sealing won’t fix
- Recent patching, new patches need time to cure before sealcoating
If your asphalt has major structural damage, sealcoating won’t solve it. Sealer protects healthy asphalt. It doesn’t repair severely compromised pavement.
A good rule: if you can see the base layer or if the asphalt feels unstable underfoot, focus on repairs first. Sealcoating works best on asphalt that’s structurally sound but showing surface wear.
Check your asphalt on a sunny day. The heat makes problems more visible. Soft spots feel squishy, and cracks show up clearly in the light.
Remove Loose Debris, Leaves, and Surface Dirt
Start with the basics: clear away everything sitting on top of your asphalt. Leaves, dirt, sticks, and loose gravel all block the sealer from bonding to the surface.
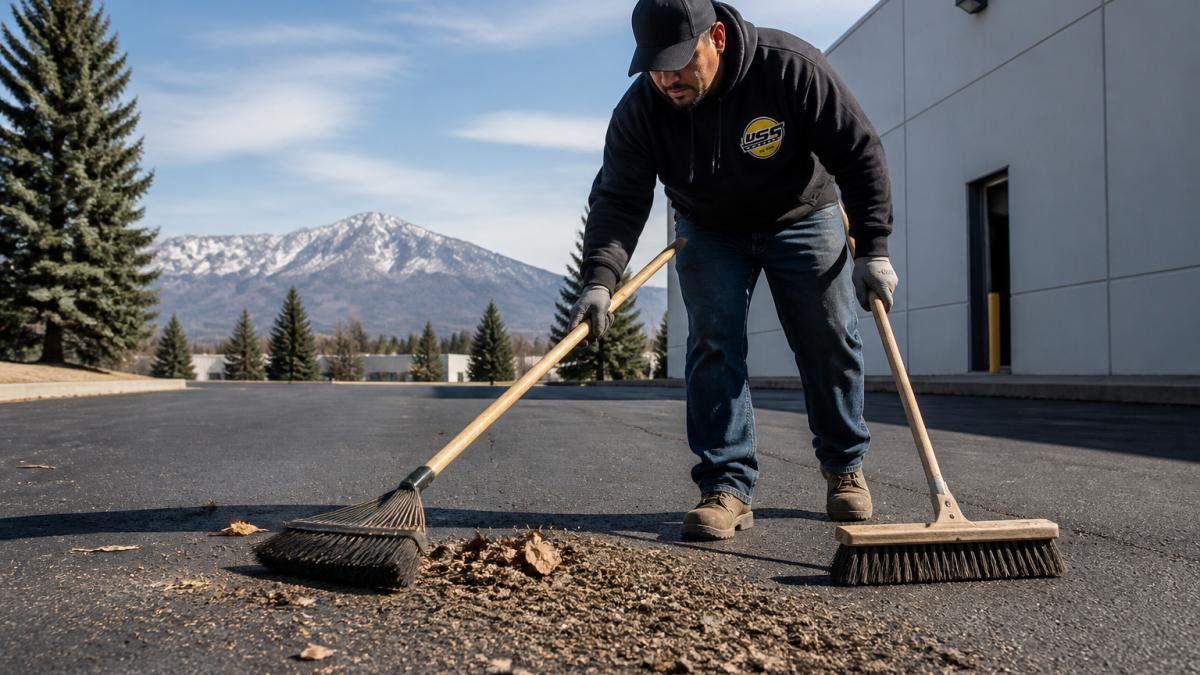
Use a stiff brush and broom to sweep the entire driveway or parking lot. Push hard enough to remove packed-down dirt but not so hard you damage the asphalt.
Pay special attention to:
- Edges where debris collects
- Cracks where dirt gets trapped
- Low spots where water pools and leaves gather
- Areas near trees or landscaping
Don’t skip this step. Debris left behind will create spots where the sealer won’t adhere. You’ll end up with patchy coverage and early failure.
If you have heavy debris or haven’t swept in a while, do it twice. The first sweep removes the bulk. The second gets the fine dust.
Clean the Surface with Pressure Washing
After sweeping, pressure wash the entire surface. This removes embedded dirt, dust, and algae that a broom can’t reach.
Use a pressure washer with at least 2,000 PSI. Start at one end and work systematically across the surface. Keep the nozzle moving to avoid gouging the asphalt.
Key steps for pressure washing:
- Start with a wide spray pattern, this prevents damage to the asphalt
- Work in overlapping passes, ensure you cover every inch
- Pay extra attention to edges and cracks, these trap the most dirt
- Rinse thoroughly, any remaining soap or cleaner will interfere with sealer adhesion
- Let water drain completely, standing water prevents drying
After pressure washing, inspect the surface. You should see bare asphalt with no visible dirt or residue. If you still see stains or buildup, wash again.
High-pressure washing can damage old or weakened asphalt. If your pavement is crumbling or has soft spots, use lower pressure (around 1,500 PSI) and keep the nozzle further away from the surface.
Treat Oil Stains and Grease Before Sealcoating
Oil and grease stains prevent sealer from bonding. If you apply sealer over oil, it will fail.
Look for dark spots on your asphalt. These are oil stains from vehicles. Fresh stains are dark brown or black. Older stains fade to a lighter color but still block sealer adhesion.
Here’s how to treat them:
For fresh oil stains:
- Sprinkle an absorbent material (kitty litter, sand, or commercial absorbent) over the stain
- Let it sit for 24-48 hours to absorb the oil
- Sweep it up and dispose of it properly
- Pressure wash the area to remove residue
For stubborn or old stains:
- Use a commercial oil spot primer or surface prep product designed for asphalt
- Follow the product instructions carefully
- These products chemically treat the stain so sealer can bond over it
- Allow the recommended drying time before applying sealer
Don’t skip oil stain treatment. We’ve seen sealcoating fail within weeks when oil wasn’t properly addressed. The sealer simply won’t stick to an oily surface.
If you have multiple oil stains, treat them all before you start sealcoating. This takes extra time but prevents expensive failures later.
Repair Cracks and Potholes Before Sealcoating
Cracks and potholes need repair before sealcoating. Sealer fills surface cracks but won’t fix structural damage, and if you seal over a failing repair, the sealer will crack along the same lines within a season.
Decide first: fill, patch, or replace?
- Hairline cracks (under 1/4 inch), these can be sealed over directly with crack filler or left to the sealer itself
- Working cracks (1/4 inch and wider), clean and fill with an asphalt crack filler before sealing
- Alligator cracking (a web of small cracks), usually signals a failing base or aged pavement; sealing alone won’t stop it, and widespread alligatoring often means the area needs patching or replacement
- Potholes and missing chunks, always patch before sealing
- Soft or spongy spots, these point to underlying drainage or base problems that patching won’t fix; address the cause or the repair will fail again
A good rule: if you can see the base layer, or the asphalt feels unstable underfoot, focus on repair or replacement first. Sealcoating works best on asphalt that’s structurally sound but showing surface wear.
Filling cracks:
- Clean out loose debris with a wire brush or compressed air, filler won’t bond to dirty cracks
- Use a crack filler designed for asphalt (cold-pour or hot-pour, depending on the product)
- Apply according to the label, most require filling the crack flush with the surface
- Allow the full cure time (commonly 24-48 hours) before sealcoating
Patching potholes:
- Remove loose material and debris from the hole
- Use a pothole patching compound or cold-mix asphalt
- Fill slightly above the surrounding surface level
- Compact it firmly, a loose patch will fail under traffic
- Allow curing time before sealing
Why repair quality decides sealer life:
Sealer is a thin film. It flexes with the pavement beneath it, so any repair that moves, settles, or holds moisture will telegraph through the sealer as a new crack or a bond failure.
Mark each repaired area with a small stake or chalk so you can find it again during the final inspection and confirm it’s fully cured before sealing.
Match the repair to the defect: fill hairline and working cracks, patch potholes, and investigate soft spots before sealing. A solid, fully cured repair is the foundation for a sealcoat that lasts.
How Long Asphalt Should Dry Before Sealcoating
Moisture is the enemy of sealer adhesion. Wet asphalt won’t accept sealer properly, and the coating will fail. After cleaning and repairs, you need to wait for the surface to dry completely, but “completely dry” is easier to say than to confirm. This section gives you practical checks and a realistic timeline so you don’t seal too early.
What controls drying time:
- Air and surface temperature, warm surfaces shed moisture faster than cool ones
- Humidity, low humidity helps; high humidity slows evaporation dramatically
- Sun exposure, direct sun dries pavement much faster than shade
- Wind, a steady breeze speeds drying; still air slows it
- Recent rainfall, if it rained recently, wait longer, especially in low spots and cracks
- Crack and patch material, fresh filler and patching compound hold moisture longer than the surrounding asphalt
Realistic drying windows:
In ideal conditions (sunny, warm, low humidity, light wind), a washed surface can be ready in 15-30 minutes. On cooler or humid days, plan on 4-6 hours minimum, and many contractors simply wait overnight to be safe.
Three practical dryness checks before you seal:
- The touch test, press your palm flat on the asphalt. It should feel dry and warm, not cool or damp. Check several spots, not just one.
- The plastic-sheet test, tape a clear plastic sheet (a square foot is enough) to the pavement in a shady area and leave it for 15-20 minutes. If condensation forms under the plastic, moisture is still escaping and the surface isn’t ready.
- The visual scan, look for wet spots, shiny patches, and dark damp areas. Pay special attention to cracks, edges, and low spots, which dry last.
If you’re unsure, wait longer. Applying sealer to damp asphalt is one of the most common reasons for premature failure.
Weather planning beyond a single temperature threshold:
Don’t judge readiness by air temperature alone. Check the forecast for at least 24-48 hours after application, and account for:
- Rain, sealer needs time to cure before exposure to water; a passing shower can ruin a fresh coat
- Overnight temperatures, if temps are forecast to drop near or below the product’s minimum application temperature, the sealer may not cure properly
- Direct sun and wind, these can dry sealer too fast and cause streaking or incomplete film formation
- The product label, every sealer lists minimum application and curing temperatures; that label overrides any general rule of thumb
Don’t sealcoat if rain is in the forecast within the cure window, and don’t seal when overnight temperatures are expected to fall below the product’s stated minimum. Check the label first, then the forecast.
Dry means dry at the surface and in the cracks. Use the touch test, the plastic-sheet test, and the forecast together, not any one alone, before you start sealing.
Your Asphalt Sealcoating Preparation Checklist
Use this checklist to ensure you’ve completed every preparation step before sealcoating:
| Step | Task | Status |
|---|---|---|
| 1 | Assess asphalt condition for major damage | ☐ |
| 2 | Sweep entire surface with stiff brush | ☐ |
| 3 | Pressure wash at 2,000+ PSI | ☐ |
| 4 | Rinse thoroughly and inspect | ☐ |
| 5 | Treat all oil stains with primer or absorbent | ☐ |
| 6 | Fill cracks larger than 1/4 inch | ☐ |
| 7 | Patch all potholes and damaged areas | ☐ |
| 8 | Allow repairs to cure fully (24-48 hours) | ☐ |
| 9 | Verify surface is completely dry | ☐ |
| 10 | Check weather forecast for 48 hours ahead | ☐ |
Don’t skip any step. Each one prevents a common cause of sealcoating failure.
After you’ve completed this checklist, your asphalt is ready for professional sealcoating. The surface is clean, repairs are solid, and moisture is gone.
Frequently Asked Questions
How do you prepare asphalt before sealcoating?
Preparing asphalt for sealcoating involves five key steps: inspect the surface for damage, remove loose debris and leaves, pressure wash the entire area, treat oil and grease stains, and repair cracks and potholes. Each step ensures the sealer bonds properly to the asphalt. Proper preparation is the difference between a sealcoat that lasts years and one that fails within months. Allow the surface to dry completely before application, typically 24 to 48 hours depending on weather conditions.
How long should asphalt dry before sealcoating?
Asphalt should dry for 24 to 48 hours before sealcoating, depending on air temperature, humidity, and surface moisture. Check the surface by touching it, it should feel dry to the touch with no damp spots. In cooler or humid conditions, allow extra drying time. Applying sealer to wet or damp pavement causes poor adhesion and premature peeling, which is why this step is critical to long-term performance.
Do cracks need to be repaired before sealcoating?
Yes, cracks should be filled before sealcoating. Water seeps into cracks and expands during freeze-thaw cycles, causing further damage. Crack filler or crack sealing material prevents water infiltration and allows the sealer to create a uniform protective coat. Small cracks can be filled with crack filler; larger cracks or potholes require patching material. Addressing these repairs first extends the life of your sealcoat significantly.
Can you sealcoat asphalt that has oil stains?
Oil stains reduce sealer adhesion and can cause peeling. Treat oil spots with an oil spot primer or surface preparation product before sealcoating. These products help the sealer bond to the affected area. Severe stains may require additional cleaning or degreasing. Addressing oil stains during preparation prevents the sealcoat from failing prematurely in those problem areas.
Proper preparation is what separates sealcoating that lasts from work that fails. When you’re ready to move forward, Utah Sealcoat & Striping handles the entire process with the precision it demands. We prepare surfaces correctly, apply quality sealer, and back every job with a warranty. Get a free quote and let our team ensure your asphalt gets the protection it deserves.
